Paraview
Running ParaView interactively via GUI
Start a DelftBlue Desktop session from Open OnDemand. Inside the desktop, open a terminal and load ParaView from the visual software stack:
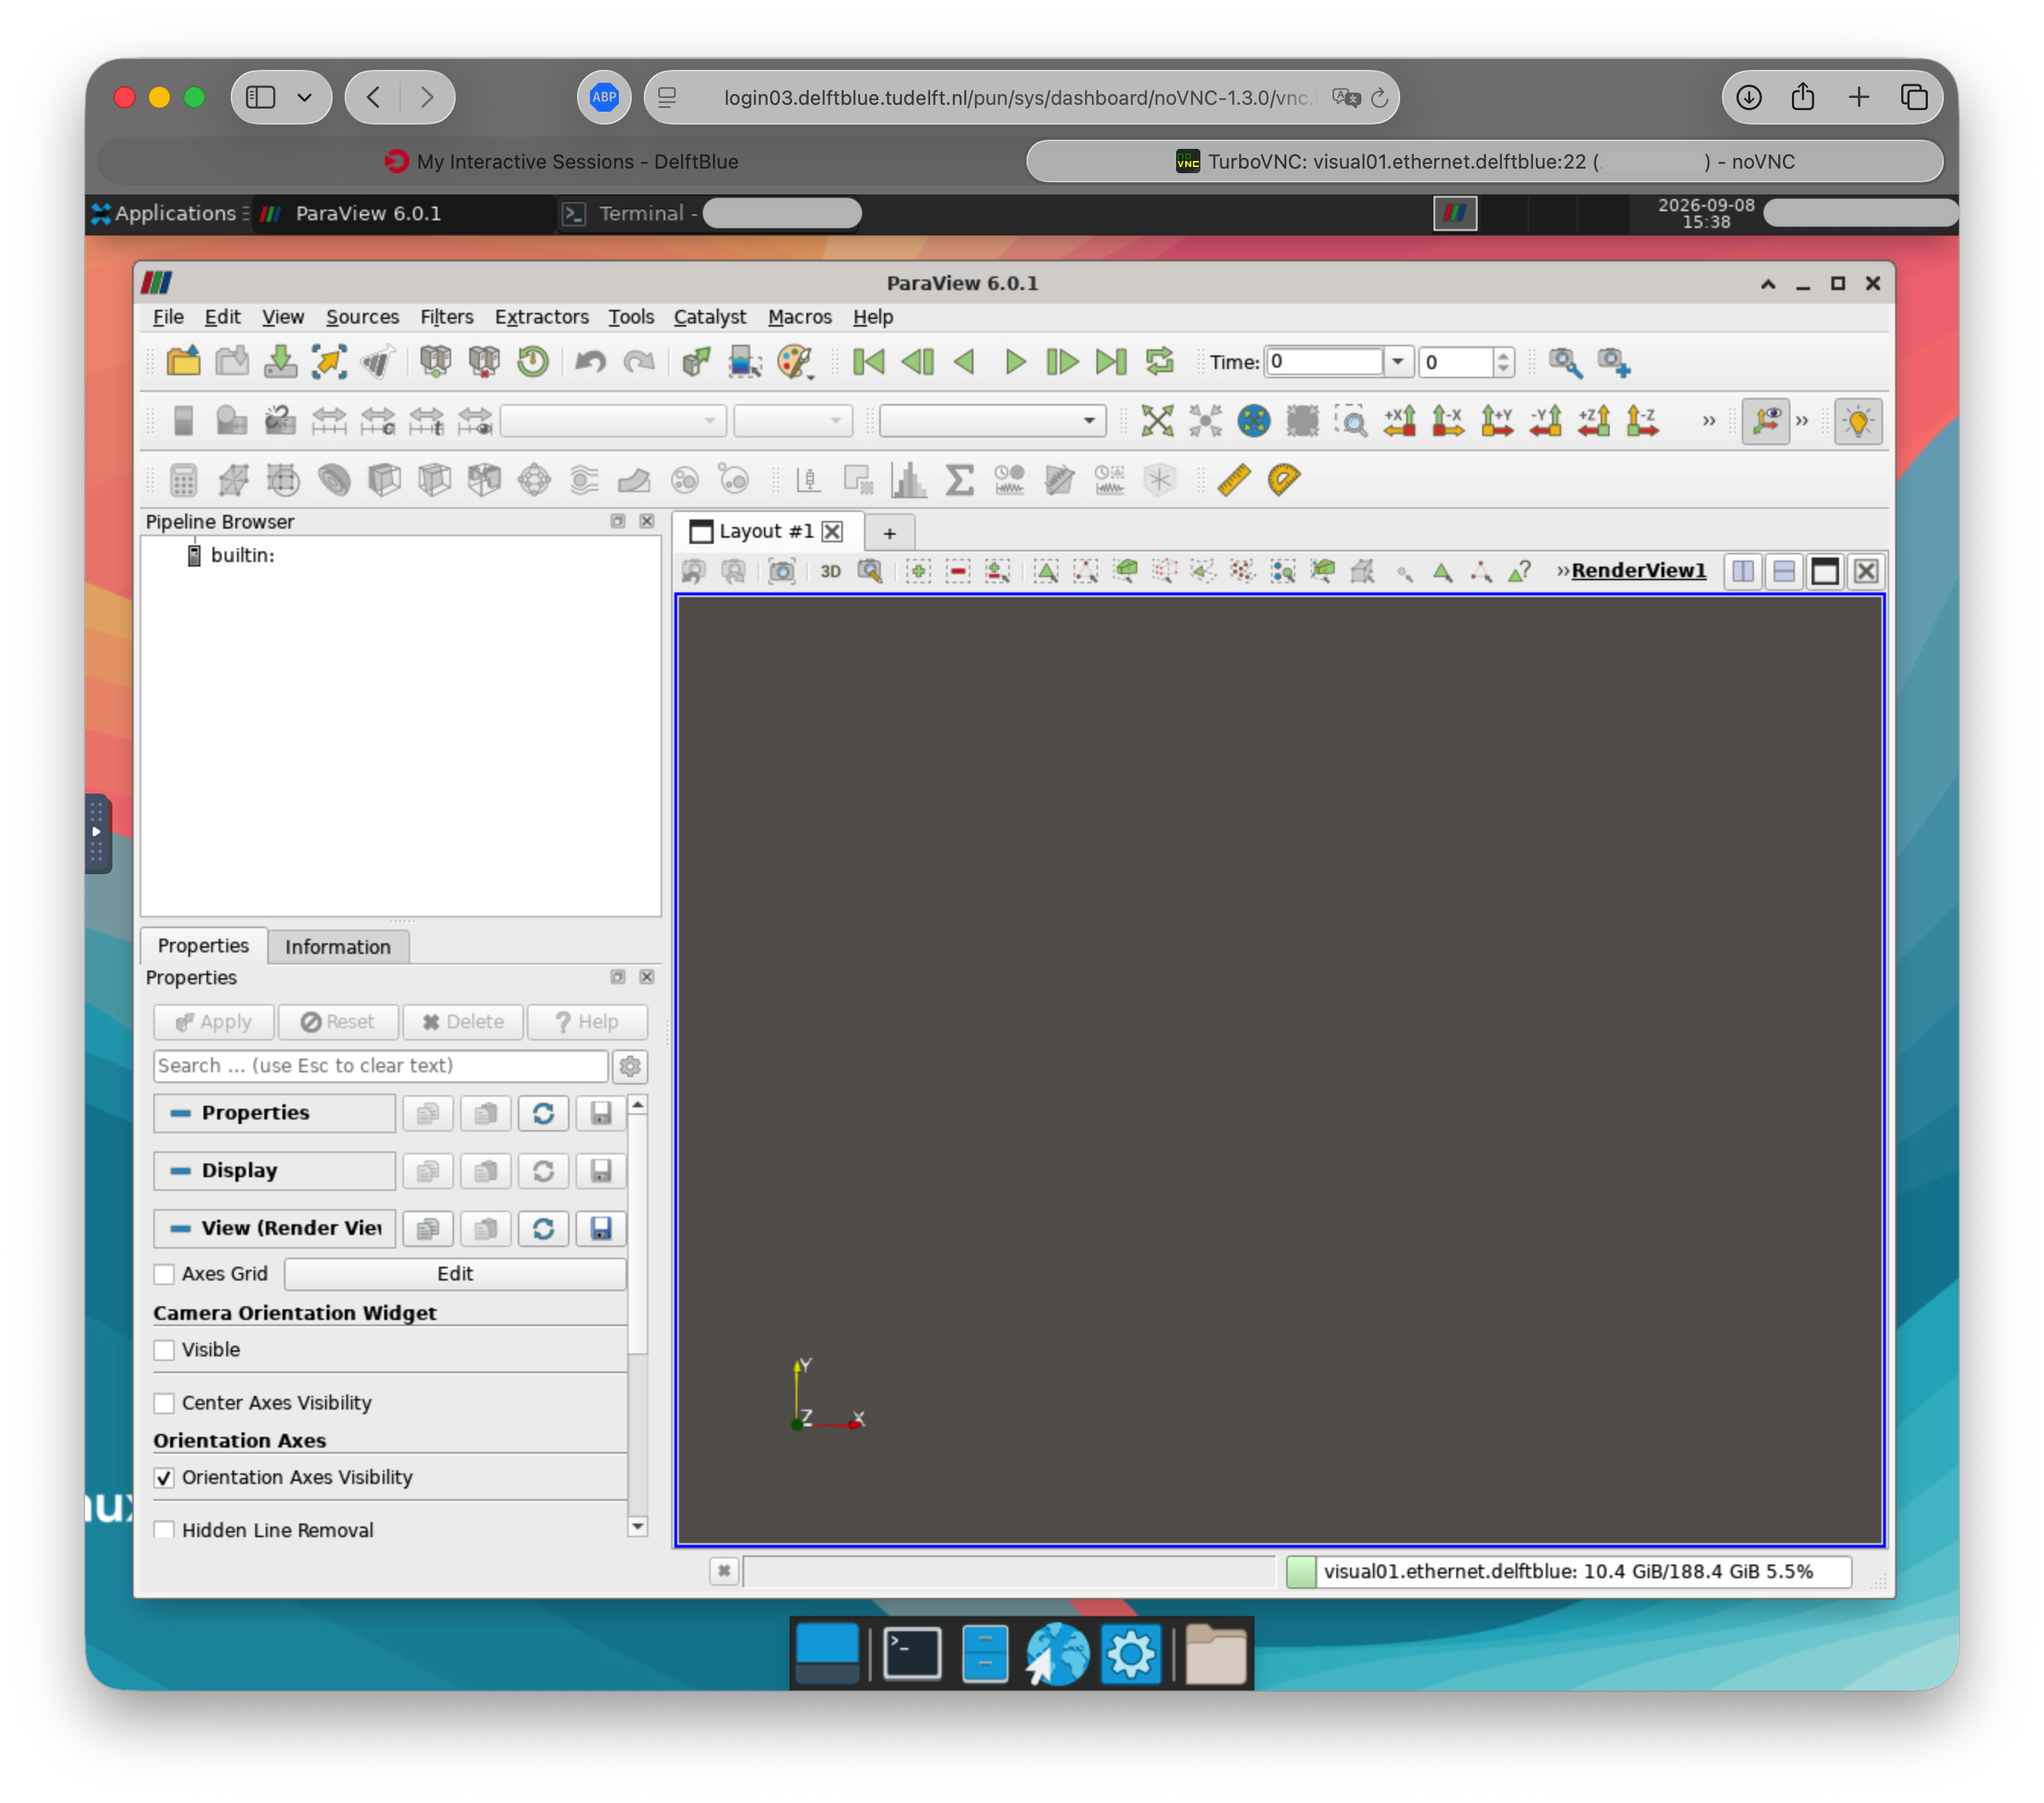
ParaView renders with software OpenGL (Mesa) in the desktop. For GPU-accelerated rendering there is a dedicated ParaView app under Interactive Apps; see the Open OnDemand page.
Running ParaView on your own PC, connected to pvserver on DelftBlue
In order to make use of Paraview rendering on DelftBlue, the following setup must be used:
- A
pvserveris running on one of the login nodes of DelftBlue. - A Paraview client is open on a user's local computer, being connected to the running instance of
pvserveron DelftBlue.
Below, you will find a step-by-step guide on how to facilitate this setup.
Match the client and server versions
Your local ParaView client must be the same version as the pvserver
running on DelftBlue. Check the server version with pvserver --version
after loading the module, and download the matching client from the
ParaView download page.
Linux users
1. Create an SSH connection to DelftBlue.
The SSH connection should specifically provide a) X-server forwarding, and b) port forwarding. For example:
The command above does two things: a) it enables the X-forwarding (by using the -X flag), and b) it tunnels the port "12345" on DelftBlue into the port "3333" on your local machine (by using the -L flag with [local-port]:localhost:[remote-port]).
Note: for your local port, you can use any number you like, as long as you do not tunnel this port for any other purposes. For your DelftBlue port, try to use a random five-digit number: this prevents clashes with other users trying to do the same on your login node.
2. Load the paraview module.
3. Start the pvserver, utilising the DelftBlue port you are forwarding.
You should see the following output:
[<NetID>@login01 ~]$ pvserver -sp=12345

Waiting for client...
Connection URL: cs://login01:12345
Accepting connection(s): login01:12345
4. Start and connect a local instance of Paraview.
Start a local instance of Paraview (the same version as the pvserver on
DelftBlue — see the note above).
Then go to File -> Connect -> Add server to configure your tunneling settings. There, give your server a descriptive name, use server type "Client/Server", use "localhost" as Host, and your local forwarding port as "Port", e.g.:
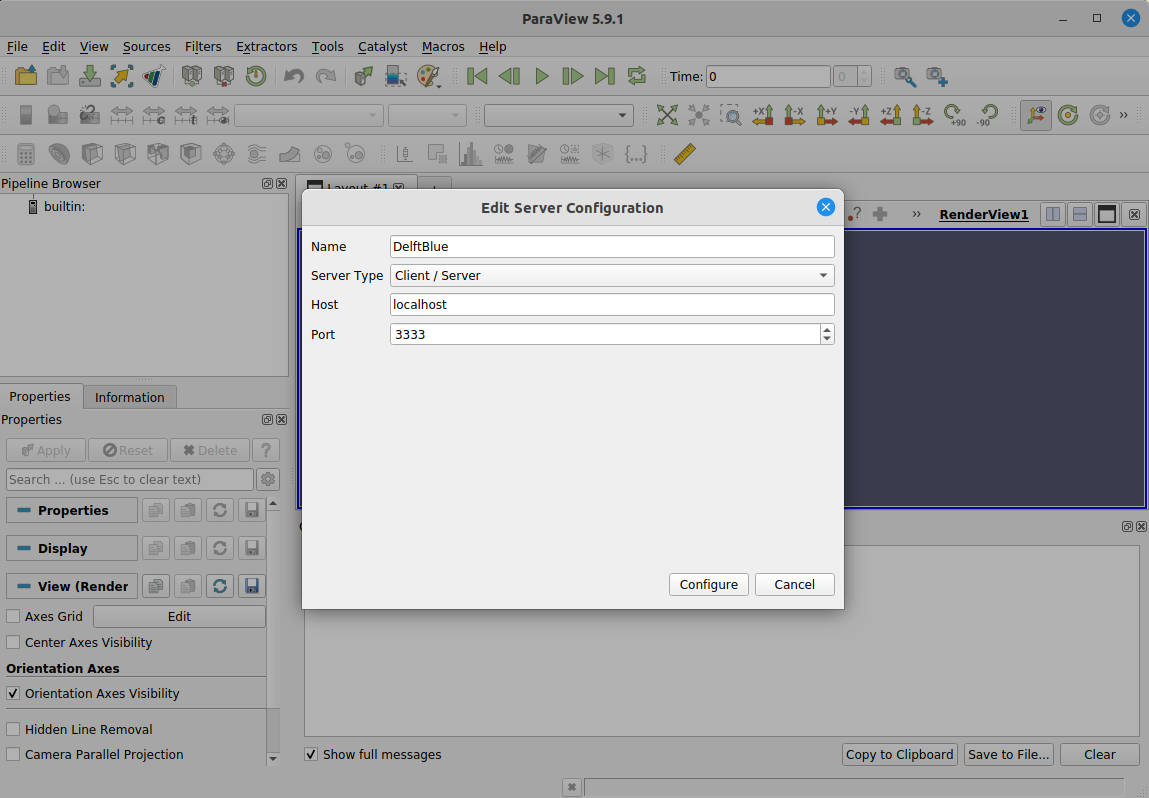
Click "Configure", select startup type "Manual", click "Save". Now click "Connect".
In your DelftBlue terminal, you should see "Client connected":
[<NetID>@login01 ~]$ pvserver -sp=12345

Waiting for client...
Connection URL: cs://login01:12345
Accepting connection(s): login01:12345
Client connected.
And in your local instance of Paraview you should see the correct server in "Pipeline Browser":
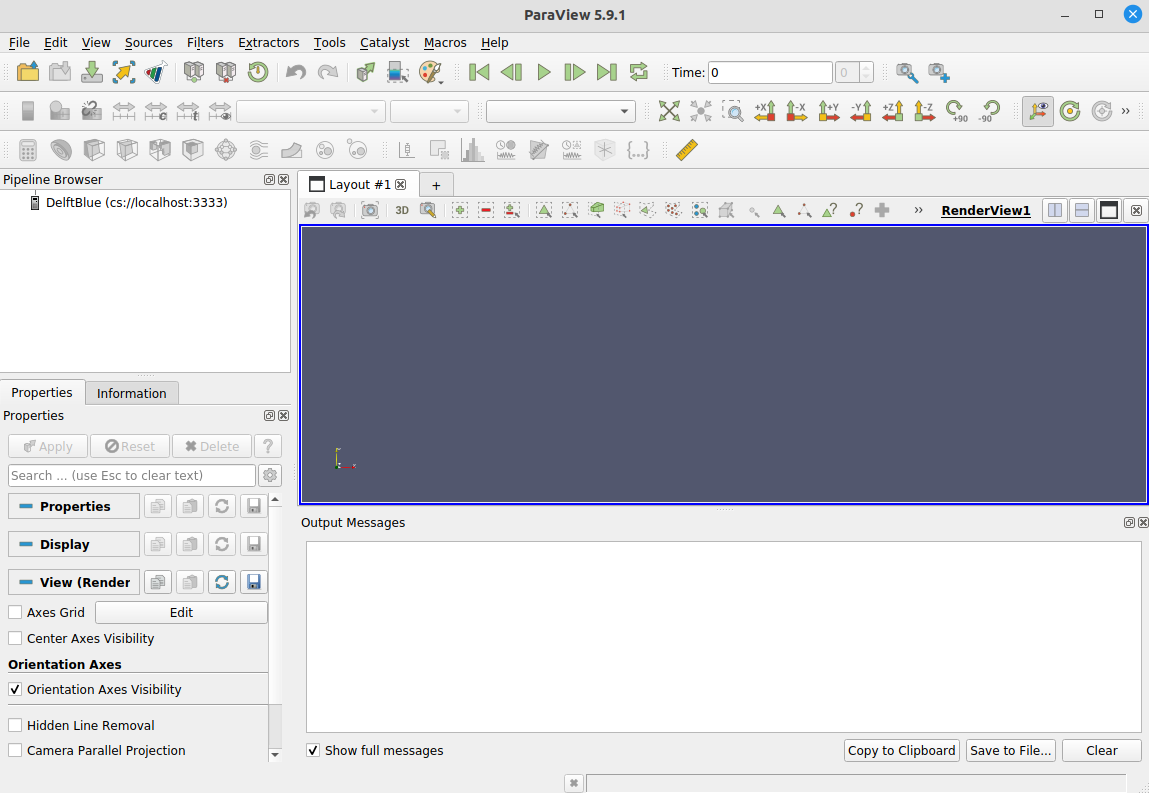
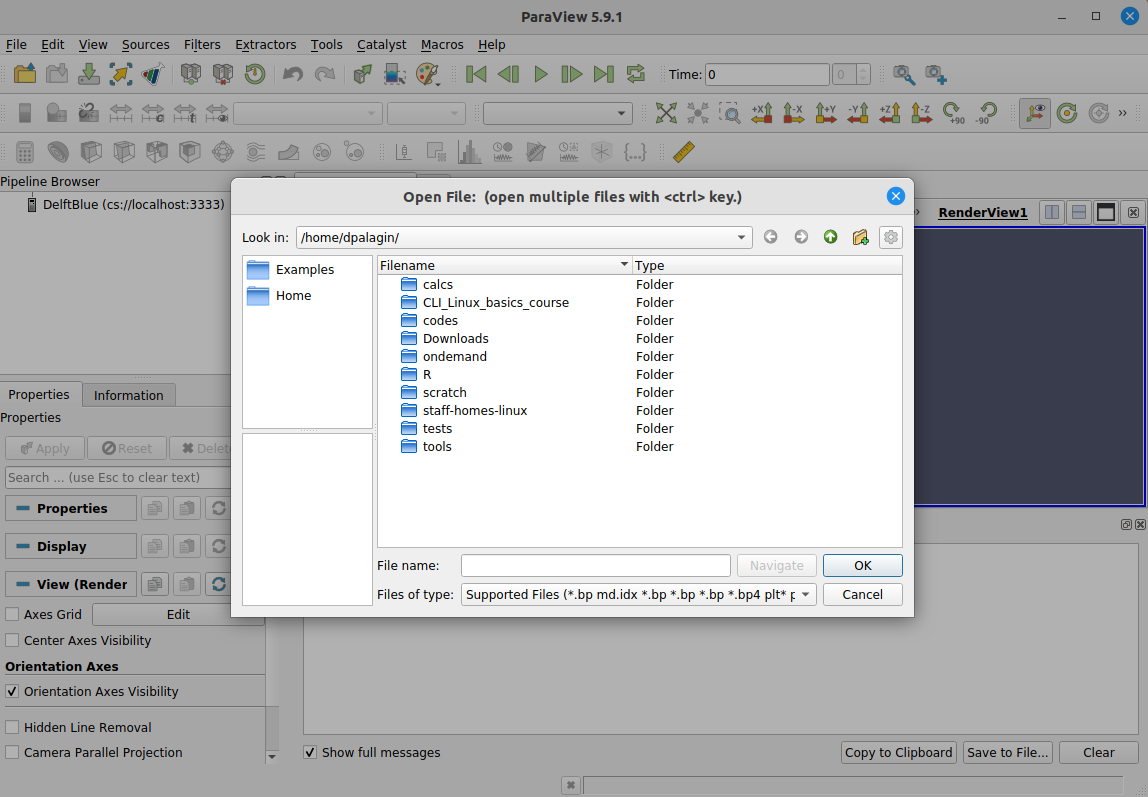
In the File -> Open menu you should now be able to navigate your DelftBlue home directory:
Windows users
The Windows instructions below rely on using the Bitvise SSH Client.
1. Enable X-forwarding
In order for Bitvise SSH client to be able to display graphics, you need the following:
- Have an X-server program installed and running on your Windows laptop. For example, Xming:
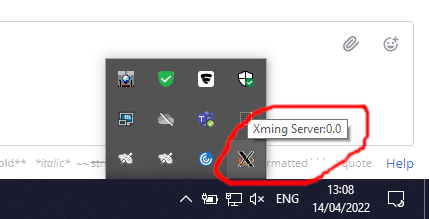
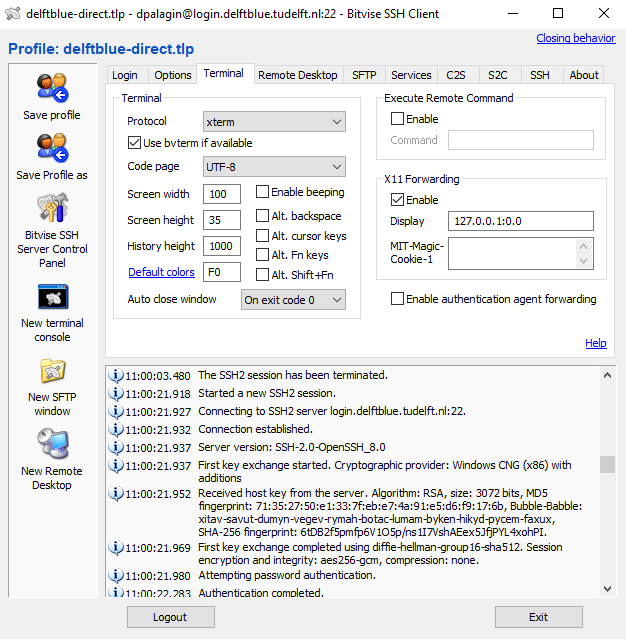
- Configure Bitvise SSH client to allow X11 Forwarding (open the tab called "Terminal", and check the "Enable" box under the section "X11 Forwarding"):
2. Enable port-forwarding
We have to "tunnel" a port (here, "12345") on DelftBlue into a port (here, "3333") on your local machine.
Note: for your local port, you can use any number you like, as long as you do not tunnel this port for any other purposes. For your DelftBlue port, try to use a random five-digit number: this prevents clashes with other users trying to do the same on your login node.
Open the tab called "C2S" ("client-to-server") and enter the following:
- Listen interface: 127.0.0.1 (equivalent to "localhost").
- Listen Port: 3333 (local port).
- Destination Host: login.delftblue.tudelft.nl (DelftBlue address).
- Destination Port: 12345 (DelftBlue port we are forwarding).
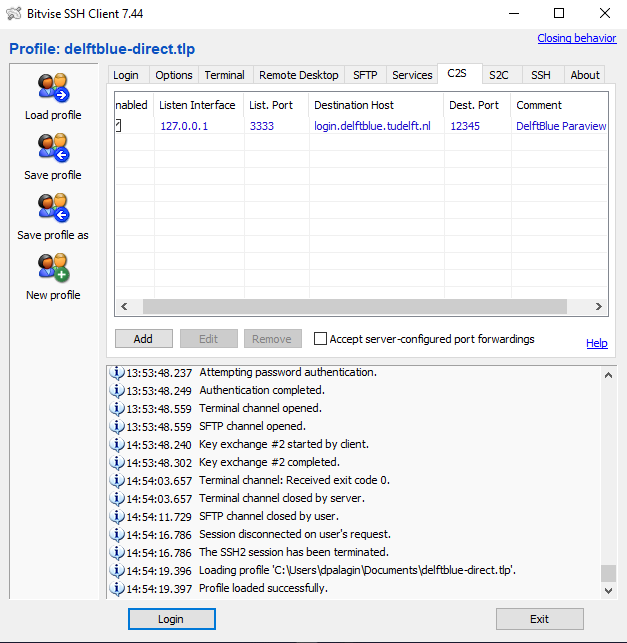
What this does, is opening the 127.0.0.1:3333 (localhost:3333) as a new pseudo-address for a DelftBlue port 12345. While the "tunnel" is open, you can directly connect your local Paraview instance to localhost:3333, and the connection will be referred to DeftBlue.
3. Connect to DelftBlue
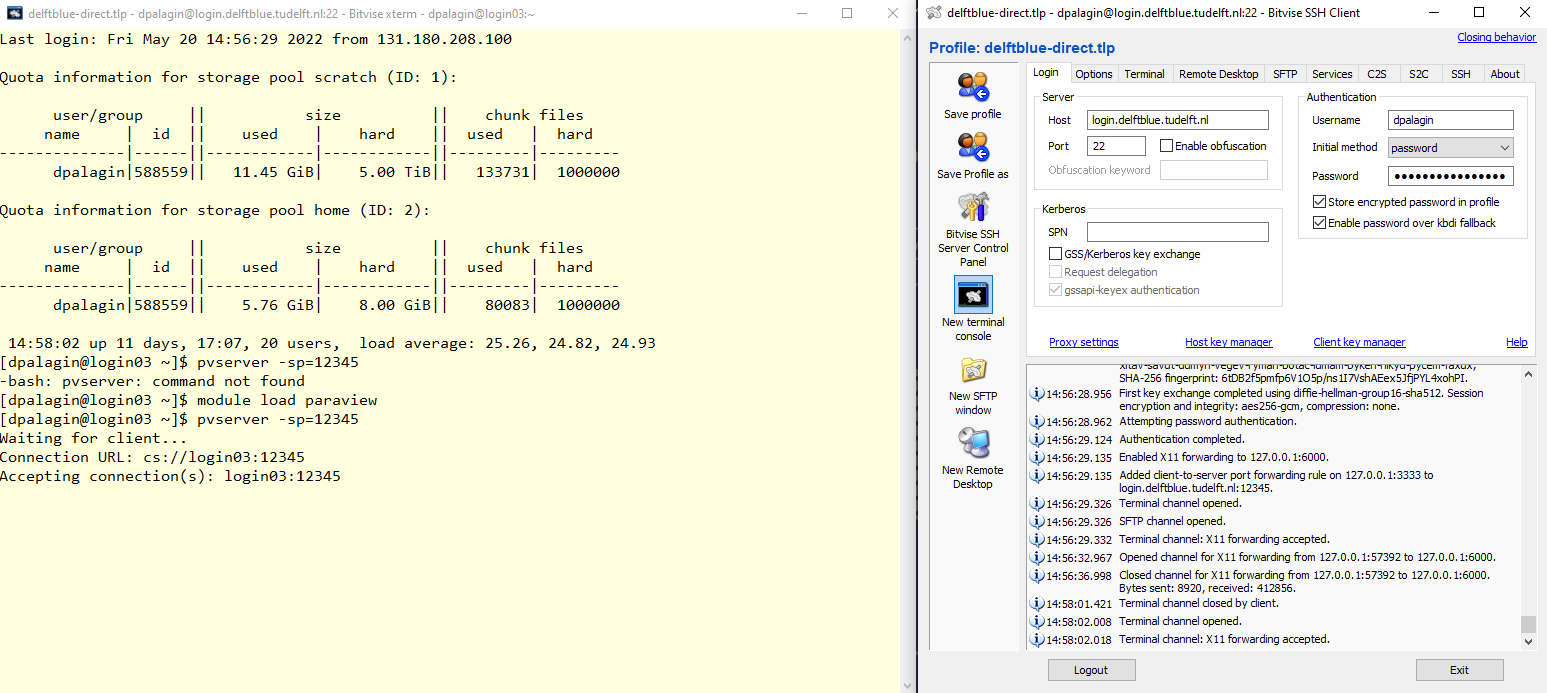
4. Load the paraview module.
5. Start the pvserver, utilising the DelftBlue port you are forwarding.
You should see the following output:
[<NetID>@login01 ~]$ pvserver -sp=12345

Waiting for client...
Connection URL: cs://login01:12345
Accepting connection(s): login01:12345
6. Start and connect a local instance of Paraview.
Start a local instance of Paraview (the same version as the pvserver on
DelftBlue — see the note above).
Then go to File -> Connect -> Add server to configure your tunneling settings. There, give your server a descriptive name, use server type "Client/Server", use "localhost" as Host, and your local forwarding port as "Port", e.g.:
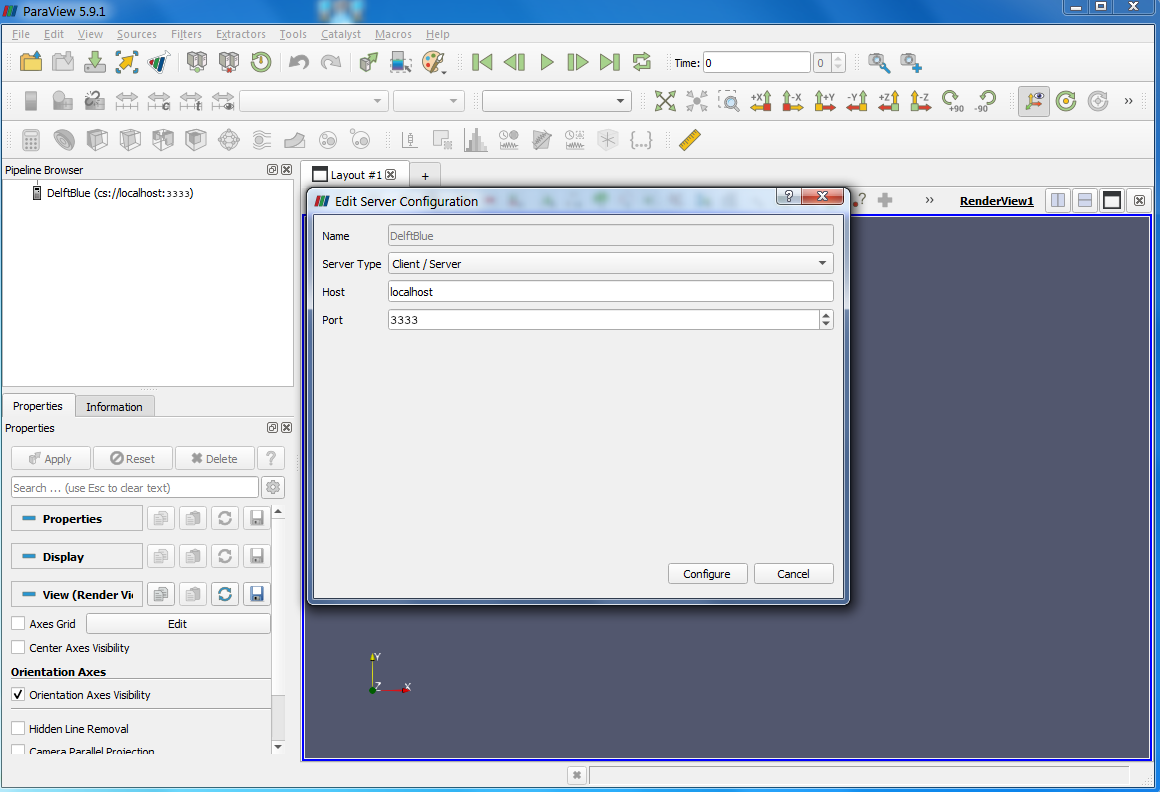
Click "Configure", select startup type "Manual", click "Save". Now click "Connect".
In your DelftBlue terminal, you should see "Client connected":
[<NetID>@login01 ~]$ pvserver -sp=12345

Waiting for client...
Connection URL: cs://login01:12345
Accepting connection(s): login01:12345
Client connected.
And in your local instance of Paraview you should see the correct server in "Pipeline Browser":
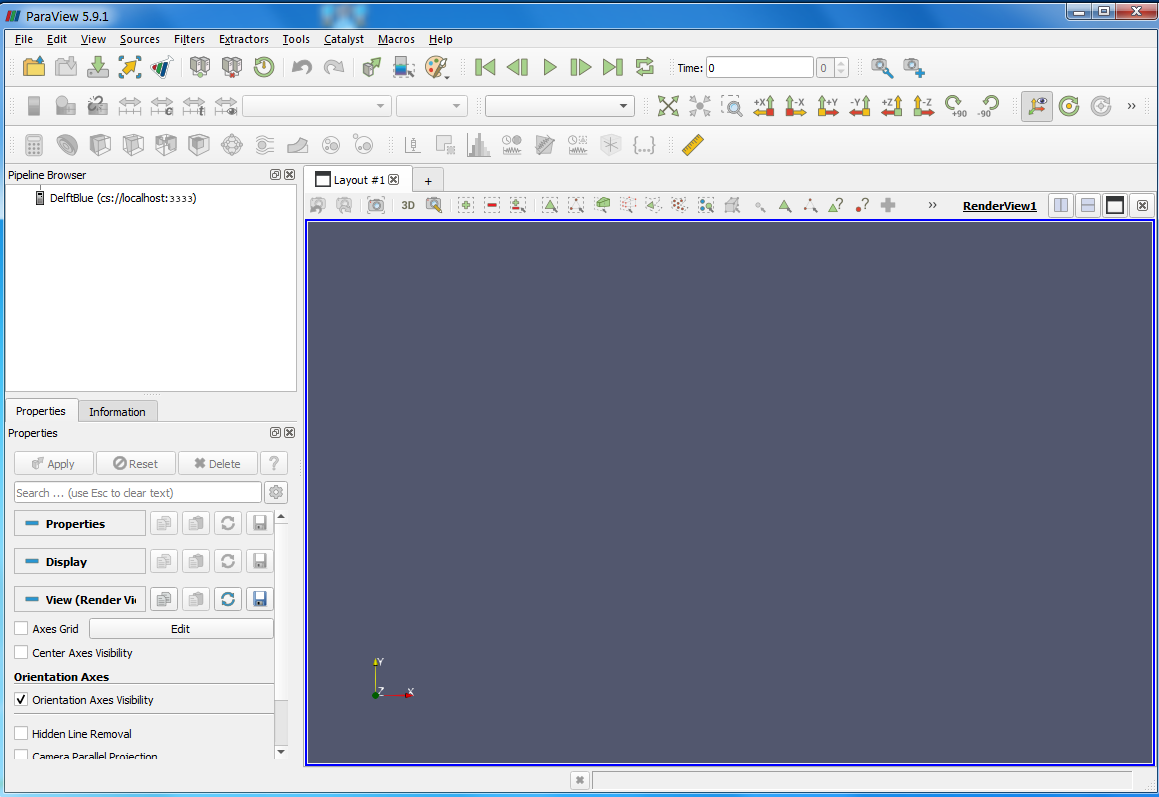
In the File -> Open menu you should now be able to navigate your DelftBlue home directory: